


WORM MANIA!!!
Now you know all about composting ... how about throwing a few worms
into the mix?
by Patty Hoenigman
 f you want the best tasting vegetables this year, the
healthiest plants indoors or out, if you want to save water by not running
your garbage disposal or just want to have the fun of watching worms do
their work, then composting a la worms could be for you.
f you want the best tasting vegetables this year, the
healthiest plants indoors or out, if you want to save water by not running
your garbage disposal or just want to have the fun of watching worms do
their work, then composting a la worms could be for you.
 Composting is the process by which nature breaks down
or decomposes organic matter so that it can be reused again. This decaying
process happens naturally, but can be helped along by the use of worms.
Worms can live quite happily in a bin with your garbage. They will accelerate
the composting process and help avoid some of the other problems associated
with composting in bins without worms.
Composting is the process by which nature breaks down
or decomposes organic matter so that it can be reused again. This decaying
process happens naturally, but can be helped along by the use of worms.
Worms can live quite happily in a bin with your garbage. They will accelerate
the composting process and help avoid some of the other problems associated
with composting in bins without worms.
Worm mania has caught on all across the county. Teachers
in grade schools and science classes are keeping worm bins in their classrooms.
Families are replacing their garbage disposal with worm bins. People young
and old are becoming fond of these innocent creatures, realizing the good
they do for our planet. In fact, without their help, and the help of their
tinier friends the microbes, nothing on our planet would ever deteriorate.
Imagine that!
Casting call
So, why is everyone into worm bins? The castings (technically
known as worm poop) are a very rich source of minerals. By the time materials
have been processed by the worm and the microbes in their intestines, the
resulting castings are in a form which can be readily taken up by plants
as a slow release fertilizer. The Red Wiggler worm - the same ones you'd
take fishing - are voracious eaters, consuming up to their own weight in
food every day. They need lots of food, like in a compost pile, to stay
alive. If your garden soil is rich with organic materials and compost, they
will be happy there, too, and will aerate your soil, keeping it loose for
your plants to grow strong and healthy.
If what you really want for your birthday this year
is a pound of worms to help you convert your garbage back into healthy,
usable garden fertilizer, that's a sure sign you've been hooked!
Worm has bins
Here are some simple instructions for making your own
worm bin. Don't sweat the details - there's lots of flexibility and it's
hard to go wrong.
Start with a plastic or wooden box about the size of
a folded sweater. Using a regular drill with a 1/4" or smaller drill
bit, drill a bunch of holes across the bottom, along the upper edge and
in the lid. This will provide air that worms need to breath. If you plan
to keep your bin outside where rain could get in it, don't put holes in
the lid. - worms can't swim! (You've may have seen worms come up out of
the ground after a heavy rain; they do this to keep from drowning.) They
do need drainage, so it's a good idea to set your bin up on a couple of
pieces of wood so any excess water can drain out of the bin.
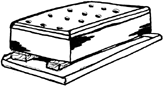
Use a plastic or wood box for your worm bin. Drill 1/4" or smaller
holes in the sides, bottom and top to allow air to circulate (omit top holes
if rainwater can enter). Set the box up on some runners to allow for drainage.
Next, make some bedding. All you need is a few sections
of a newspaper. Don't worry about the inks - they aren't toxic to worms.
Starting at the top of a section, tear downwards, making 1 inch strips.
It should tear easily, because you're following the grain of the paper.
Make a whole bunch of strips, plop them in a bucket of water, and let them
sit overnight. This allows the chlorine to dissolve out of the paper. The
next day, drain off the water, fluff up the paper and put it in your worm
bin.
Now you're ready to put your worms into their new home!
Start with approximately one pound of worms. Put them all together at one
end of the bin. Let them get adjusted to their new home for about 3 days.
They'll be happy with just the newspaper, which they love to eat.
After three days, start feeding them slowly: a banana
peel or watermelon rind is fine, some old bread, last week's leftovers,
coffee grounds - you name it, they'll eat it! Give them a small amount by
burying it and covering the food with the bedding. Since your worms have
tiny mouths, the food they eat actually has to be predigested by microbes.
Don't put too much food in at once or it may get smelly. A well kept bin
will have no odor, and will not attract fruit flies as long as the food
has been covered up.
There are a couple of other things Red Wiggler worms
must have.
- The worms need calcium to reproduce, so add a crushed Tums tablet
or an egg shell once in a while.
- The worms grind up the food by keeping a piece of grit in their gizzard,
since they don't have teeth. So, add a handful of any old soil to your bin
when you're starting. Worms live in dark moist places, so keep the lid on
and mist it a little if it's looking dry (not too much!).
Upkeep is easy. Rotate the feeding places around the
bin so there isn't too much in any one area. Find an old serving spoon (a
rusted one from Goodwill costs 25¢ and works just fine) to use for
turning the mix.
After 2 or 3 weeks, use the spoon to lift the bedding
from the bottom of the bin. Mix in a little fresh bedding to keep it fluffed
and aerated, and to keep the holes in the bottom of the box open so air
can circulate. Worms need fresh air and moisture on their skin to be able
to breath.
If you're going away on vacation, just feed them a little
extra before you leave and don't worry about them. If you'll be gone longer
than 2 weeks, you may want to have a friend look in on them.
Worm harvest
Plan to harvest your worm bin in about four to six months.
During this time, your worm population will have quadrupled, they will have
eaten lots of food and bedding and you'll be ready to start fresh.
How do you get the worms separated from the castings?
First let the worms rest for 2-3 weeks without feeding them anything. Don't
worry, they won't starve. Gently move all the materials in the bin to one
side. Make some new paper bedding, like when you first started, and spread
it on the other side of the bin. Put a little food on the fresh bedding
and pretty soon the worms will start moving over to find fresh food. In
a few weeks time, you'll be able to take the old materials out with very
few worms left in it.
Sprinkle a little as a top dressing around your house
plants or in your garden. The castings hold water so well, and are such
a rich source of nutrients, that you wouldn't want to plant in straight
castings - your plant might actually drown! Use a small amount and work
it in to the top drip line, then water as usual.
For more information on worms, where to buy them, or
on backyard composting, contact Patty Hoenigman on the ROTLINE, 436-7986.
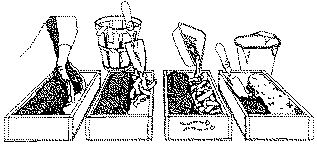
Harvest time! First, don't put any new food in the box for two to three
weeks. Then, gently move the castings to one side of the box. Next, add
fresh newspaper bedding, like when you started, to the other side of the
box and add a few food scraps. In a few weeks, the worms will all have moved
to the new side and you can remove the old material with very few worms
remaining. Use the castings as a top dressing on house plants or in your
garden,

The Master Composter Program is sponsored by Solana Recyclers, Inc.
and Quail Botanical Gardens, both non-profit organizations located in Encinitas.
A Basic Composting Workshop is given on the first and third Saturday of
the month at Quail Botanical Gardens, (exit Encinitas Blvd. off of I-5 and
turn east). It starts at 11A.M. and lasts about 2 hours. The talk is free
with a $2 admission to the gardens.


